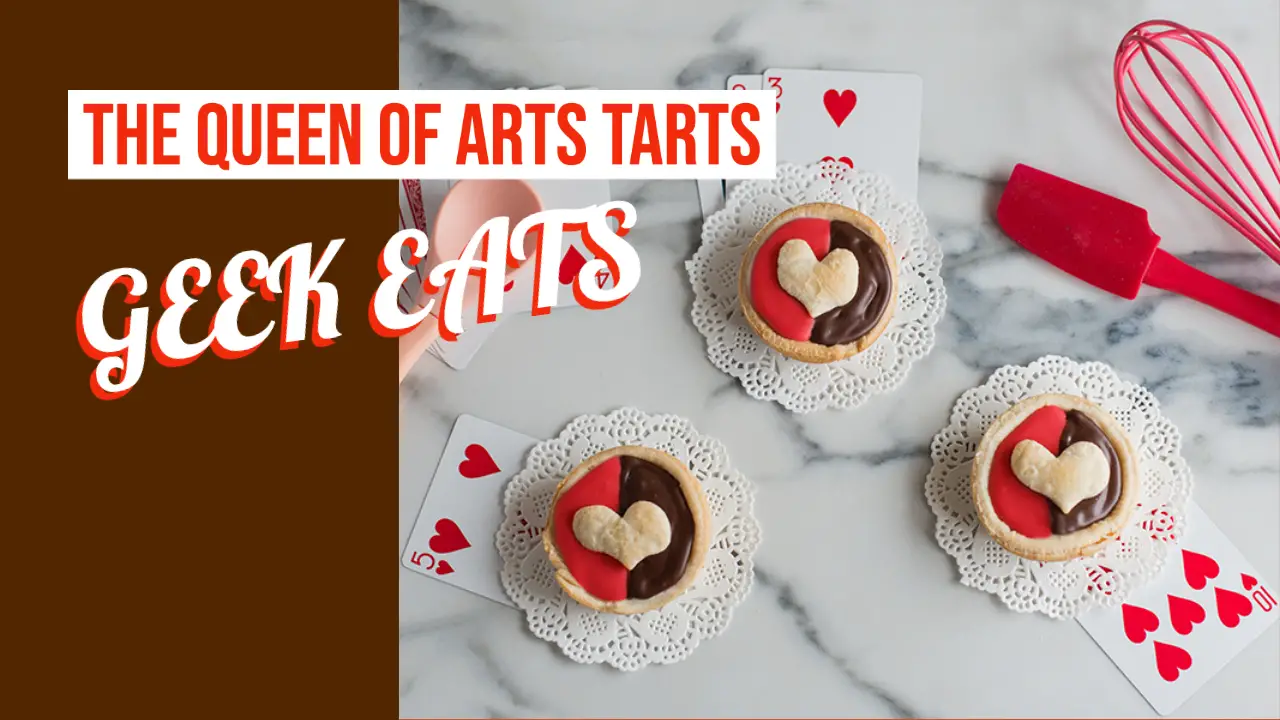
February is the month of hearts and who is more emblematic of that than the Queen of Hearts!? For this Valentine’s Day, D23 has shared a recipe for The Queen of Hearts Tarts. Make these tarts for your Valentine’s Day celebrations and then share how they turned out in the comments below!
The Queen of Hearts Tarts – GEEK EATS Disney Recipe
Ingredients
For Tarts:
- 1 package pre-rolled frozen pie crust (in sheets)
Strawberry jam
- 1 tablespoon cold water
- ½ teaspoon gelatin powder
- 2 tablespoons milk
- ¼ cup granulated sugar
- 1 stick (½ cup) butter, softened
- 1 teaspoon vanilla extract
- For Icing:
- 1 cup powdered sugar
- 6 teaspoons milk
- ½ tablespoon cocoa powder
- Red food coloring
Equipment
- 12-hole muffin tin
- Baking sheet
- Rolling pin
- Heart-shaped cookie cutter
- Circular cookie cutter
Instructions
Step 1: Prepare the Tart Shells
- Let frozen pie crust sheets thaw as instructed on the package. Once thawed, preheat oven as instructed on the package. Spray the muffin tin with non-stick spray, or grease with butter.
- Roll out the crust dough to about half its current thickness. Using a circular cookie cutter or a glass, cut out circles of dough and gently press each circle into the muffin tin. If the sides of the dough extend over the edge of the tin, trim them carefully with a knife. With the leftover dough, cut out 12 heart-shaped pieces using a cookie cutter.
- Prick the base of each tart shell with a fork and place the hearts on a baking sheet lined with parchment paper. Bake both for around 10-12 minutes or until golden. Keep an eye on the oven, as the hearts may bake quicker and may need to be removed sooner than the shells. Allow to cool.
Step 2: Prepare the Mock Cream Filling
- In the meantime, add the gelatin powder to the cold water and allow to bloom for 5 minutes. In a small saucepan, mix the sugar and milk over low heat until the sugar is fully dissolved.
- Once the gelatin is ready, add to the saucepan and stir until fully dissolved. Remove from heat and allow to cool to room temperature.
- With a stand mixer or handheld beater, beat the butter and vanilla until smooth and creamy. Slowly add the cooled milk mixture, mixing constantly, until fully combined.
Step 3: Prepare the Icing
- In a small bowl, mix the powdered sugar and milk with a fork or spoon until smooth. Pour half the mixture into a second bowl.
- In one bowl, add 5-10 drops of red food coloring and mix. Continue to add food coloring and mix until your desired shade is reached.
- In the second bowl, add the cocoa powder and mix. If the mixture becomes too thick, add an additional ¼ teaspoon of milk.
- Spoon each of the icings into its own piping bag or plastic sandwich baggie. Cut the tip off the bag very close to the corner, creating a small nozzle for the icing.
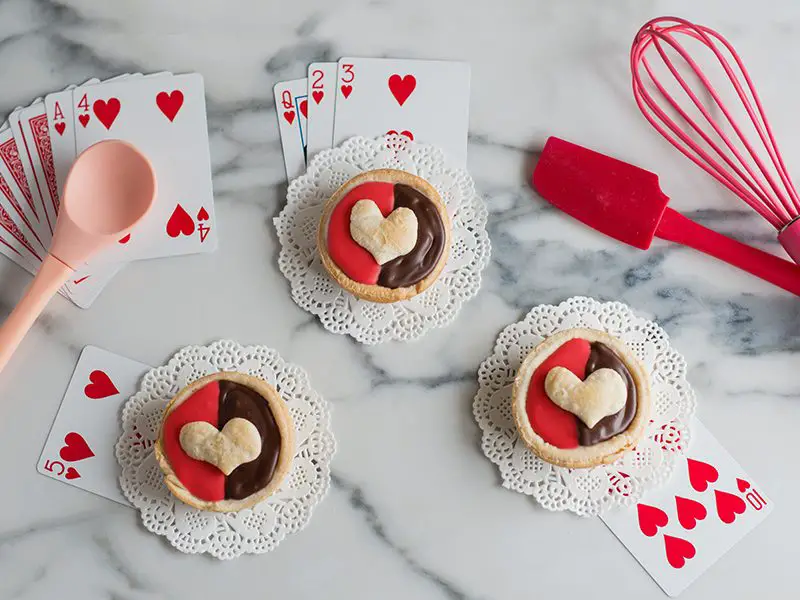
Step 4: Assemble the Tarts
- Add a spoonful of strawberry jam to each tart shell and smooth over the bottom.
- Add mock cream by the spoonful until the shell is full. Smooth the top with a spatula.
- Carefully pipe the chocolate icing onto half of each tart, and pipe red icing on the other half.
- Place one of the pie crust hearts onto each tart, aligned in the middle.
- Allow the icing to set for about 15 minutes before serving.
How did The Queen of Hearts Tarts turn out for you? Share your thoughts and experiences in the comments below!